Bank Accounts Tracker
This web application allows users to keep track of their bank accounts. The overall architecure is ASP.NET MVC 4.0 (with C# and Razor) -> DAL (Data Access Layer) -> Entity Framework -> SQL Server Database.This website uses the following tools and technologies.
- Asp.Net MVC 4.0
- Razor engine for presentation
- C# Language
- SQL Server LocalDB
- Visual Studio.NET 2012 Express for Web
- Data Validation Attributes for validation using JQuery
- Entity Framework
- Forms Authentication
- Layout and Stylesheets
- Data Access Layer (DAL) to talk to Database through LINQ
- Mail API to send mail
- User Registration
- User Login
- Change password
- Logout
- Recover password
- Add Account
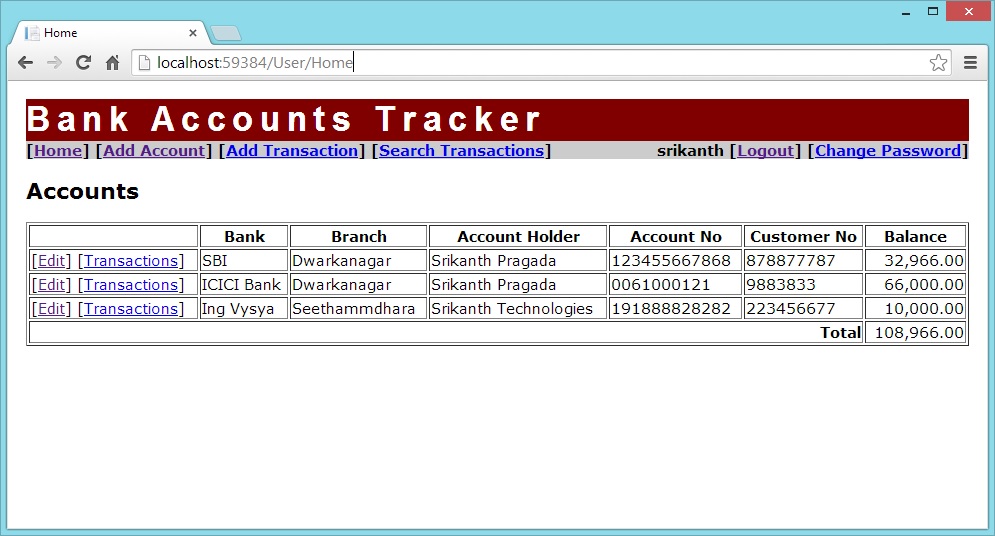
- List Accounts
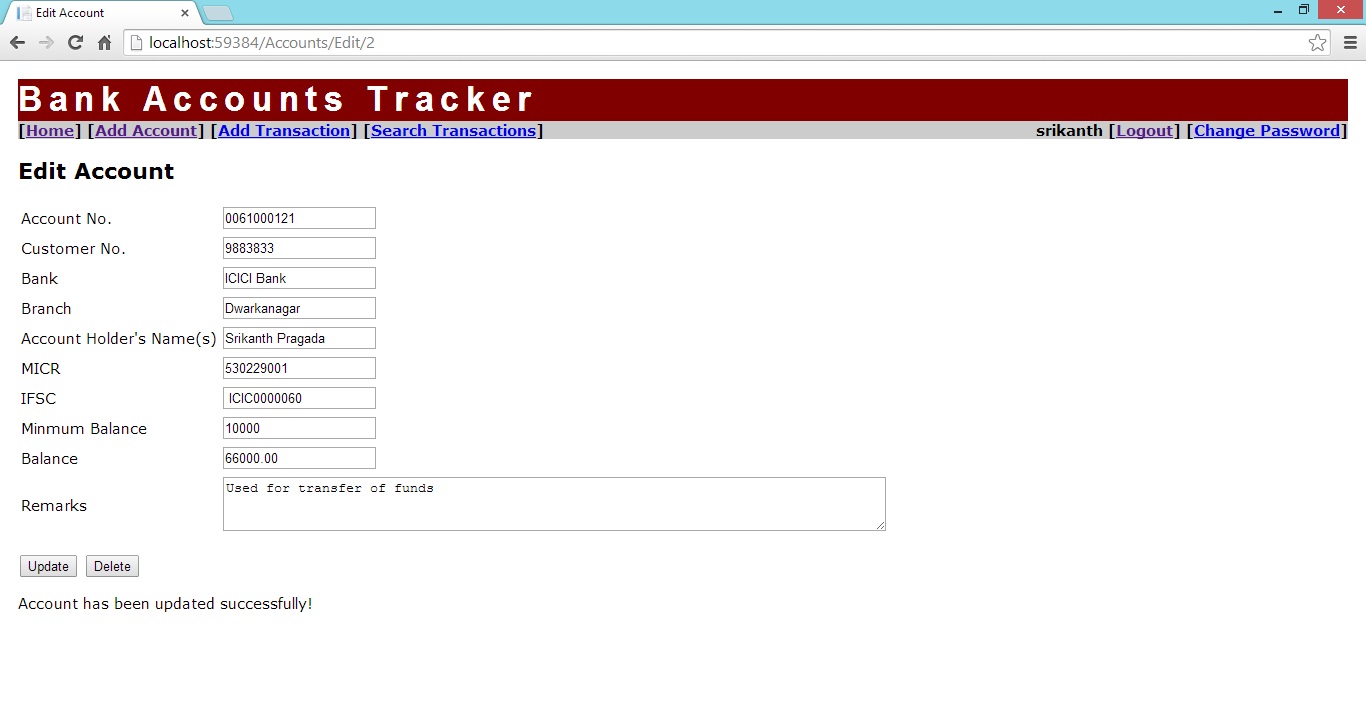
- Edit and Delete Account
- Add Transaction
- Edit and Delete transaction
- List Transactions of an Account
- Search Transactions

Steps to download, deploy and run this project
The following are the steps to be taken to run the existing part of the application. Sql Server database, which contains all required tables, is bundled along with this application.- Download bankaccounts.rar and unzip it into any directory in your system. For example, if you extract to c:\ then it will create a directory c:\bankaccounts.
- Start Visual Studio.NET 2012 Express for Web
- Open the project from the directory into which you extracted the .rar file. For example, c:\bankaccounts
- Database (bankaccounts.mdf) is placed in App_Data and it contains required tables. Tables contain some sample data for testing.
- I also provided tables.sql, which contains commands to create tables. Though not required now, it could be useful in some cases.
- In order to keep download small, i have removed .dll files from BIN folder. So, project may not run after you open it in Visual Studio. Add libraries to this project or create another project and copy source code into that new project. Run project from Visual Studio.NET after you are done with the above procedure.
- You should see login page
- Use registration page to register new user
- Login with new user and test other options